fetch를 활용하여 프론트엔드에서 데이터 요청 후 화면에 적용하기
ajax는 Asynchronous JavaScript And XML의 약자로 HTTP 통신을 통해 비동기적으로 JSON(자바스크립트 객체)과 XML 데이터를 받아오는 기능을 말합니다. 현재 XML은 거의 쓰이지 않으니 예시에서는 JSON을 사용하겠습니다.
ajax로 가져온 데이터는 DOM에 바로 적용하기 때문에 페이지를 다시 로드하지 않습니다.
예시
fetch API를 사용해서 ajax 통신으로 가져온 유저정보를 화면에 출력하는 기능을 구현해 보겠습니다.
다음과 같이 버튼과 div가 하나씩 있고, div의 id는 userInfo입니다.
<!DOCTYPE html>
<html>
  <body>
    <button>클릭</button>
    <div id="userInfo"></div>
  </body>
</html>
버튼의 onclick 속성에 콜백함수를 설정합니다.
<!DOCTYPE html>
<html>
  <body>
    <button onclick="getUser()">클릭</button>
    <div id="userInfo"></div>
  </body>
</html>
getUser라는 함수를 달아주었습니다. 이 함수 내부에서 fetch를 이용한 ajax 통신을 구현합니다.
fetch 구문
fetch(resource, options)<!DOCTYPE html>
<html>
<body>
<button onclick="getUser()">클릭</button>
<div id="userInfo"></div>
<script>
function getUser() {
const config = {
method: "get"
};
fetch("https://jsonplaceholder.typicode.com/users/1", config)
.then(response => response.json())
.then(data => console.log(data))
.catch(error => console.log(error));
}
</script>
</body>
</html>데이터 요청작업의 흐름은 다음과 같습니다.
- fetch - 매개변수로 전달한 URL과 옵션 객체를 통해 HTTP 통신을 수행합니다.
- then - 요청작업이 완료된 후 then 메서드 내부에서 다음 수행할 작업을 입력합니다. 단계적으로 여러 개 입력할 수 있습니다.
- catch - 오류가 발생하면 catch 메서드 내부가 실행됩니다. 오류가 발생하지 않는다면 then에서 작업은 종료됩니다.
위 코드에서는 아래와 같이 진행되었습니다.
- https://jsonplaceholder.typicode.com/users/1 주소로 get 요청을 보냈습니다.
- 첫 번째 then 내부에서는 받아온 response객체를 자바스크립트에서 다루기 위해 json 메서드를 사용했습니다. 두 번째 then 내부에서는 json형태로 변화된 데이터를 출력했습니다.
- 오류가 발생하면 에러가 콘솔출력됩니다.
코드를 실행하고 버튼을 클릭하면 아래와 같이 결과가 콘솔창에 출력됩니다.

통신 중에 오류가 발생하면?
config 객체를 수정해서 오류를 발생시켜 보겠습니.
const config = {
  method: "aaaaa"
};
오류가 발생하면서 catch 구문 내의 코드가 실행되었습니다.
다음으로 받아온 데이터를 단순히 콘솔 출력하는 것이 아니라 화면에 출력해 보겠습니다. 두 번째 then 구문을 수정합니다.
function getUser() {
  const config = {
    method: "get"
  };
  fetch("https://jsonplaceholder.typicode.com/users/1", config)
    .then(response => response.json())
    .then(data => {
      const name = document.createElement("div");
      const email = document.createElement("div");
      const phone = document.createElement("div");
    })
    .catch(error => console.log("fetch 에러!"));
}
각 div에 해당하는 정보를 넣어줍니다.
function getUser() {
  const config = {
    method: "get"
  };
  fetch("https://jsonplaceholder.typicode.com/users/1", config)
    .then(response => response.json())
    .then(data => {
      const name = document.createElement("div");
      const email = document.createElement("div");
      const phone = document.createElement("div");
      name.textContent = data.name;
      email.textContent = data.email;
      phone.textContent = data.phone;
    })
    .catch(error => console.log("fetch 에러!"));
}
정보가 담긴 div를 id가 userInfo인 div안에 넣어줍니다.
function getUser() {
  const config = {
    method: "get"
  };
  fetch("https://jsonplaceholder.typicode.com/users/1", config)
    .then(response => response.json())
    .then(data => {
      const name = document.createElement("div");
      const email = document.createElement("div");
      const phone = document.createElement("div");
      name.textContent = data.name;
      email.textContent = data.email;
      phone.textContent = data.phone;
      const userInfo = document.getElementById("userInfo");
      userInfo.appendChild(name);
      userInfo.appendChild(email);
      userInfo.appendChild(phone);
    })
    .catch(error => console.log("fetch 에러!"));
}
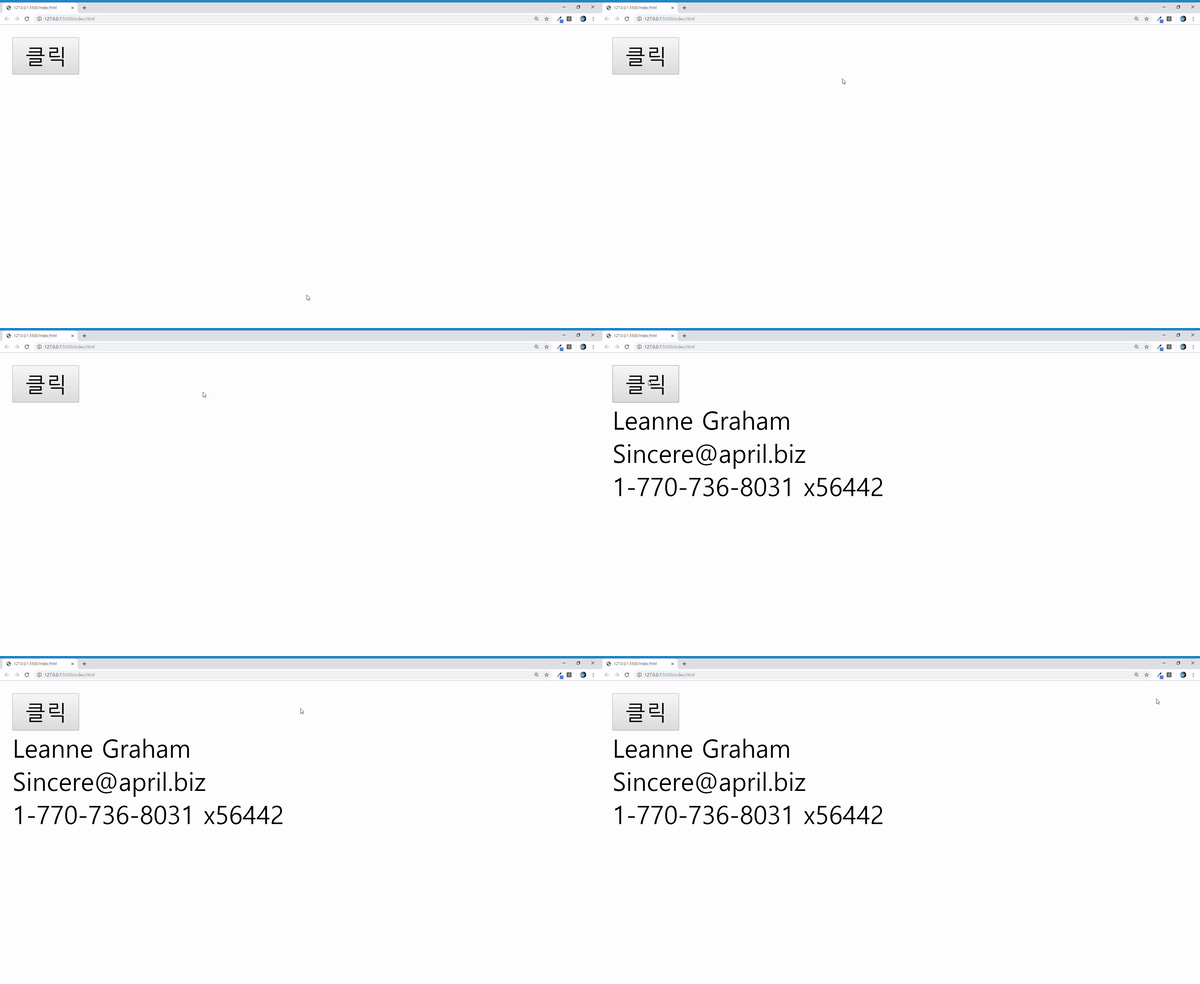
HTML을 실행하고 버튼을 클릭해 보겠습니다.

화면의 새로고침 없이 data가 바로 출력되었습니다.
Fetch API - Web API | MDN
Fetch API는 네트워크 통신을 포함한 리소스 취득을 위한 인터페이스를 제공하며, XMLHttpRequest보다 강력하고 유연한 대체제입니다.
developer.mozilla.org
'프론트엔드 HTML CSS JAVASCRIPT' 카테고리의 다른 글
| [HTML, CSS] 내용이 요소(div 등)를 벗어날 때 스크롤 적용하는 방법 - overflow (3) | 2019.08.18 |
|---|---|
| [HTML, JAVASCRIPT, CSS] 마우스 오버 시 HTML 요소(이미지, div 등) 확대(zoomIn) 하는 방법. 옆에 요소 안밀려나게/밀려나게 (3) | 2019.08.18 |
| [HTML, CSS] div 자식요소 가운데 정렬하는 방법 - margin, text-align, flexbox (1) | 2019.08.14 |
| [HTML] video 태그로 동영상 플레이어 만드는 방법 (1) | 2019.08.14 |
| [HTML, CSS] opacity로 요소, 배경화면 투명하게(흐리게)하는 방법, 자식 요소에 같이 적용되는 문제 (1) | 2019.08.14 |


